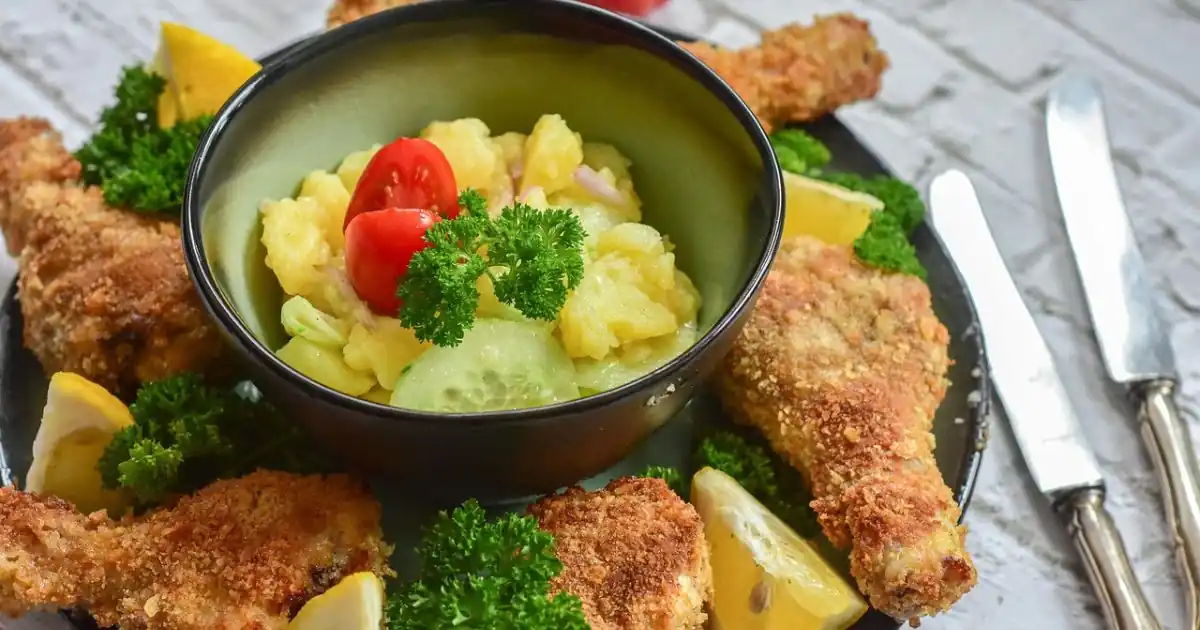
Chicken Cutlet Recipes: 10 Delicious Ways to Elevate This Classic Dish
Did you know that chicken cutlets are searched over 40,000 times monthly on Google, making them one of the most sought-after weeknight dinner solutions? It’s no surprise why chicken cutlet recipes have maintained their popularity across generations – they’re versatile, relatively quick to prepare, and beloved by both picky eaters and culinary enthusiasts alike. Whether you’re looking for a classic breaded cutlet, a healthier baked version, or an internationally inspired variation, this comprehensive guide to chicken cutlet recipes will transform the way you approach this kitchen staple.
Table of Contents
Classic Breaded Chicken Cutlet Recipe
Before we explore variations, let’s master the perfect classic chicken cutlet that serves as the foundation for countless delicious meals.
Ingredients
| Ingredient | Quantity | Possible Substitutions |
|---|---|---|
| Boneless, skinless chicken breasts | 2 large (about 1.5 lbs) | Chicken thighs (adjust cooking time) |
| All-purpose flour | 1 cup | Gluten-free flour blend |
| Eggs | 2, beaten | 1/4 cup mayonnaise mixed with 1 tbsp water |
| Breadcrumbs | 2 cups | Panko, crushed cornflakes, crushed crackers |
| Parmesan cheese, grated | 1/4 cup | Pecorino Romano or nutritional yeast |
| Italian seasoning | 1 tbsp | Combination of dried oregano, basil, and thyme |
| Garlic powder | 1 tsp | Fresh minced garlic (2 cloves) |
| Salt | 1 tsp | Seasoned salt |
| Black pepper | 1/2 tsp | White pepper |
| Olive oil | 1/4 cup | Vegetable oil, avocado oil, or clarified butter |
| Lemon wedges | For serving | Orange wedges or balsamic glaze |
Timing
Preparation time: 20 minutes (including pounding and breading the chicken) Cooking time: 15 minutes Total time: 35 minutes, which is approximately 30% faster than most traditional chicken parmesan recipes that require baking time. This efficiency makes chicken cutlets perfect for busy weeknights when you need a delicious dinner on the table quickly.
Step-by-Step Instructions
Step 1: Prepare the Chicken
Place your chicken breasts between two sheets of plastic wrap or inside a large resealable bag. Using a meat mallet or heavy pan, gently pound the chicken to an even thickness of about 1/4 inch. This uniform thickness is crucial for even cooking and that perfect texture we all crave in a good cutlet.
Pro tip: If your chicken breasts are particularly large, consider slicing them horizontally before pounding to create more manageable pieces.
Step 2: Craft Your Breading Assembly Line
Arrange three shallow dishes in a row. For your first station, marry the flour with a dusting of salt and pepper to create the perfect foundation. At your second station, whisk the eggs into a sunny pool of golden goodness. For your final destination, orchestrate a harmonious blend of breadcrumbs, Parmesan cheese, Italian seasoning, garlic powder, and remaining seasonings.
Pro tip: Adding a tablespoon of water to your beaten eggs helps create a thinner, more even coating that helps the breadcrumbs adhere better.
Step 3: Transform Plain Poultry Into Culinary Canvas
Working with one piece at a time, dance each chicken cutlet through the flour, giving it a gentle shake to release its powdery excess. Next, bathe it in the golden egg wash, allowing the liquid gold to cascade off before moving on. Finally, nestle each piece into the aromatic breadcrumb mixture, ensuring an even blanket of crumbs embraces every inch of chicken.
Pro tip: Employ the “dry hand, wet hand” technique – reserve one hand for the flour and breadcrumbs while the other navigates the egg bath, preventing your fingers from becoming a breaded masterpiece themselves.
Step 4: Rest the Breaded Cutlets
Place the breaded cutlets on a wire rack and let them rest for 5-10 minutes. This resting period helps the coating adhere better to the chicken and results in a crispier finished product.
Pro tip: If you have time, you can refrigerate the breaded cutlets for 30 minutes or even overnight for an extra crispy exterior.
Step 5: Cook the Cutlets
Cascade liquid gold (olive oil) into a generous skillet and awaken it over a lively flame until it dances with anticipation but doesn’t smoke. Serenade each cutlet for a blissful 3-4 minutes on each side, coaxing them to a sunset-golden hue and ensuring they reach their perfect internal destiny of 165°F/74°C.
Pro tip: Work in batches if necessary to avoid overcrowding the pan, which can lead to steaming instead of browning. Add more oil between batches as needed.
Step 6: Rest and Serve
Usher your culinary creations onto a throne of paper towels, allowing them to relinquish any unnecessary oil. Grant them a moment’s meditation for 3-5 minutes before serving with bright citrus wedges.
Pro tip: For an ephemeral burst of flavor, crown the hot cutlets with a whisper of crystalline sea salt just after their hot oil bath.
Nutritional Information
| Nutrient | Amount per Serving (1 cutlet) |
|---|---|
| Calories | 385 |
| Protein | 35g |
| Carbohydrates | 24g |
| Fat | 18g |
| Saturated Fat | 4g |
| Fiber | 1g |
| Sugar | 1g |
| Sodium | 690mg |
| Cholesterol | 145mg |
Note: Nutritional values may vary based on specific ingredients used and cooking methods. This information is based on harnessing the Mediterranean magic of liquid gold (olive oil) for the frying process and traditional breadcrumbs.
Healthier Alternatives for the Recipe
Looking to make your chicken cutlets more nutritious without sacrificing flavor? Consider these modifications:
- Oven-Baked Instead of Fried: Awaken your culinary chamber to a toasty 425°F (220°C), arrange your breaded masterpieces on an elevated wire kingdom over a sturdy sheet, mist them with olive oil’s gentle essence, and let them transform in the oven’s warm embrace for 15-20 minutes until they reach golden perfection. This method reduces fat content by approximately 40%.
- Air Fryer Method: Cook at 380°F (193°C) for 10-12 minutes, flipping halfway. This method uses up to 75% less oil than traditional frying.
- Whole Grain Breading: Replace regular breadcrumbs with whole wheat panko or ground oats mixed with flaxseed for added fiber and nutrients.
- Lighter Protein Option: Use half the breading and only egg whites instead of whole eggs to reduce calories while maintaining a crispy exterior.
- Gluten-Free Version: Substitute regular flour with almond flour and use crushed gluten-free crackers or certified gluten-free breadcrumbs for the coating.
Serving Suggestions
Transform your chicken cutlets into a complete meal with these serving ideas:
- Mediterranean Style: Top with a simple tomato and cucumber salad dressed with lemon juice and olive oil, and accompany it with a cloud of creamy tzatziki for dipping adventures.
- Italian Classic: Blanket your creation with a ruby pool of aromatic marinara and a snowy layer of bubbling mozzarella, then broil until the cheese transforms into molten perfection. Serve atop pasta for an impromptu chicken parmesan.
- Asian Fusion: Drizzle with a soy-ginger-honey sauce and serve over steamed jasmine rice with stir-fried vegetables.
- Hearty Sandwich: Place between toasted ciabatta bread with arugula, sliced tomatoes, and garlic aioli for an elevated sandwich experience.
- Family-Style Feast: Arrange on a platter with lemon wedges alongside roasted potatoes and a vibrant tapestry of fresh greens for a celebration-worthy gathering around the table.
Common Mistakes to Avoid
- Uneven Chicken Thickness: Inconsistent thickness leads to overcooked or undercooked portions. Always coax your chicken into uniform submission, creating a perfect canvas of 1/4-inch thickness throughout.
- Skipping the Drying Step: Moisture is the enemy of crispy cutlets. Lovingly blot away every drop of moisture with absorbent paper sentinels before embarking on your breading adventure.
- Overcrowding the Pan: Placing too many cutlets in the pan at once lowers the oil temperature and creates steam, resulting in soggy coatings. Fry in batches instead.
- Oil Temperature Issues: Oil that’s too cool makes greasy cutlets; oil that’s too hot burns the exterior before the interior cooks. Aim for medium-high heat and watch for a gentle sizzle when the chicken is added.
- Flipping Too Soon: Premature flipping can tear the breading away. Wait until the first side transforms into a mesmerizing amber landscape and willingly releases from the pan before turning.
Storing Tips for the Recipe
- Refrigeration: Preserve your culinary treasures in hermetically sealed vessels with paper towel guardians between each layer to banish unwanted moisture. They’ll maintain their charm for up to 3 days.
- Freezing Uncooked Cutlets: Arrange your uncooked, breaded protégés across a flat, cold kingdom (baking sheet) and surrender them to the freezer’s icy embrace until they become fully hardened. Then relocate them to freezer bags, with parchment paper peacekeepers between layers. Cook from frozen, adding 5-7 minutes to cooking time.
- Freezing Cooked Cutlets: Allow to cool completely before freezing in airtight containers for up to 2 months. Thaw in the refrigerator overnight.
- Reheating: For the crispiest resurrection, summon your cutlets back to life in an environment warmed to precisely 350°F for 10-15 minutes. Avoid microwaving, which makes cutlets soggy.
- Prep-Ahead Strategy: Pound and breed the chicken up to 24 hours in advance, keeping them patiently waiting in their cool sanctuary until the moment of truth arrives.
How to Make Perfect Crispy Chicken Cutlets
Conclusion
These golden-crusted delicacies represent the perfect marriage of simplicity and satisfaction for cooks of every caliber. From the classic version to healthier alternatives and creative serving suggestions, you now possess a culinary arsenal to make this dish shine in your regular meal rotation. The techniques shared here – proper pounding, three-step breading, and careful cooking – ensure consistent, restaurant-quality results every time.
Ready to elevate your dinner game? Try these chicken cutlet recipes tonight, experiment with different variations, and share your creations in the review section below! Don’t forget to subscribe for more kitchen-tested recipes and cooking tips that will materialize magically in your digital letterbox.
FAQs
Q: Can chicken thighs step into the spotlight and replace chicken breasts in these cutlet creations? A: Absolutely! Boneless, skinless chicken thighs work beautifully but may require slightly different handling. Pound them gently as they’re naturally thinner and more tender, and expect a slightly longer cooking time due to their higher fat content.
Q: Why are my cutlets emerging from the pan disappointingly limp instead of gloriously crisp? A: Sogginess usually results from one of three issues: moisture on the chicken before breading, overcrowding the pan while cooking, or covering the cutlets while they’re still hot. Make sure to thoroughly pat dry the chicken, cook in batches, and let the cutlets cool on an elevated wire platform instead of a flat plate.
Q: How can I make chicken cutlets ahead of a party? A: For the best results, bread the cutlets up to a full day before your gathering and let them repose uncovered on a wire rack in the refrigerator. Cook them just before serving, or cook them completely ahead of time and reinvigorate them in a 350°F warmth chamber until they return to their crispy glory (about 10-15 minutes).
Q: Are chicken cutlets gluten-free? A: Traditional chicken cutlets contain gluten in both the powdery base and crunchy exterior coating. For a gluten-free version, substitute all-purpose flour with almond flour or corn starch, and use crushed gluten-free crackers, certified gluten-free breadcrumbs, or crushed pork rinds for the coating.
Q: What’s the secret to ensuring the breading remains faithfully attached to the chicken during cooking? A: The alchemy of perfect breading adhesion requires a completely dry chicken canvas, thorough dredging technique, firm pressure when applying breadcrumbs, allowing your breaded creations a moment of peaceful contemplation before cooking, and resisting the urge to flip them too early in the cooking process.
Tried It? Tell Us How It Went!
There are no reviews yet. Be the first one to write one.

